Get started
Your first week: from a Blender model to an AI clip
- 1
Export your model from Blender as glTF
In Blender, use File > Export > glTF 2.0 and pick glTF Binary (.glb), so the textures travel inside one file. Apply your modifiers, keep it under 50 MB, and keep a humanoid armature if you want to pose it. Stage reads .glb, .gltf and .vrm only. It does not open .blend, FBX, OBJ or USD files, so export first.
- 2
Import it in Stage
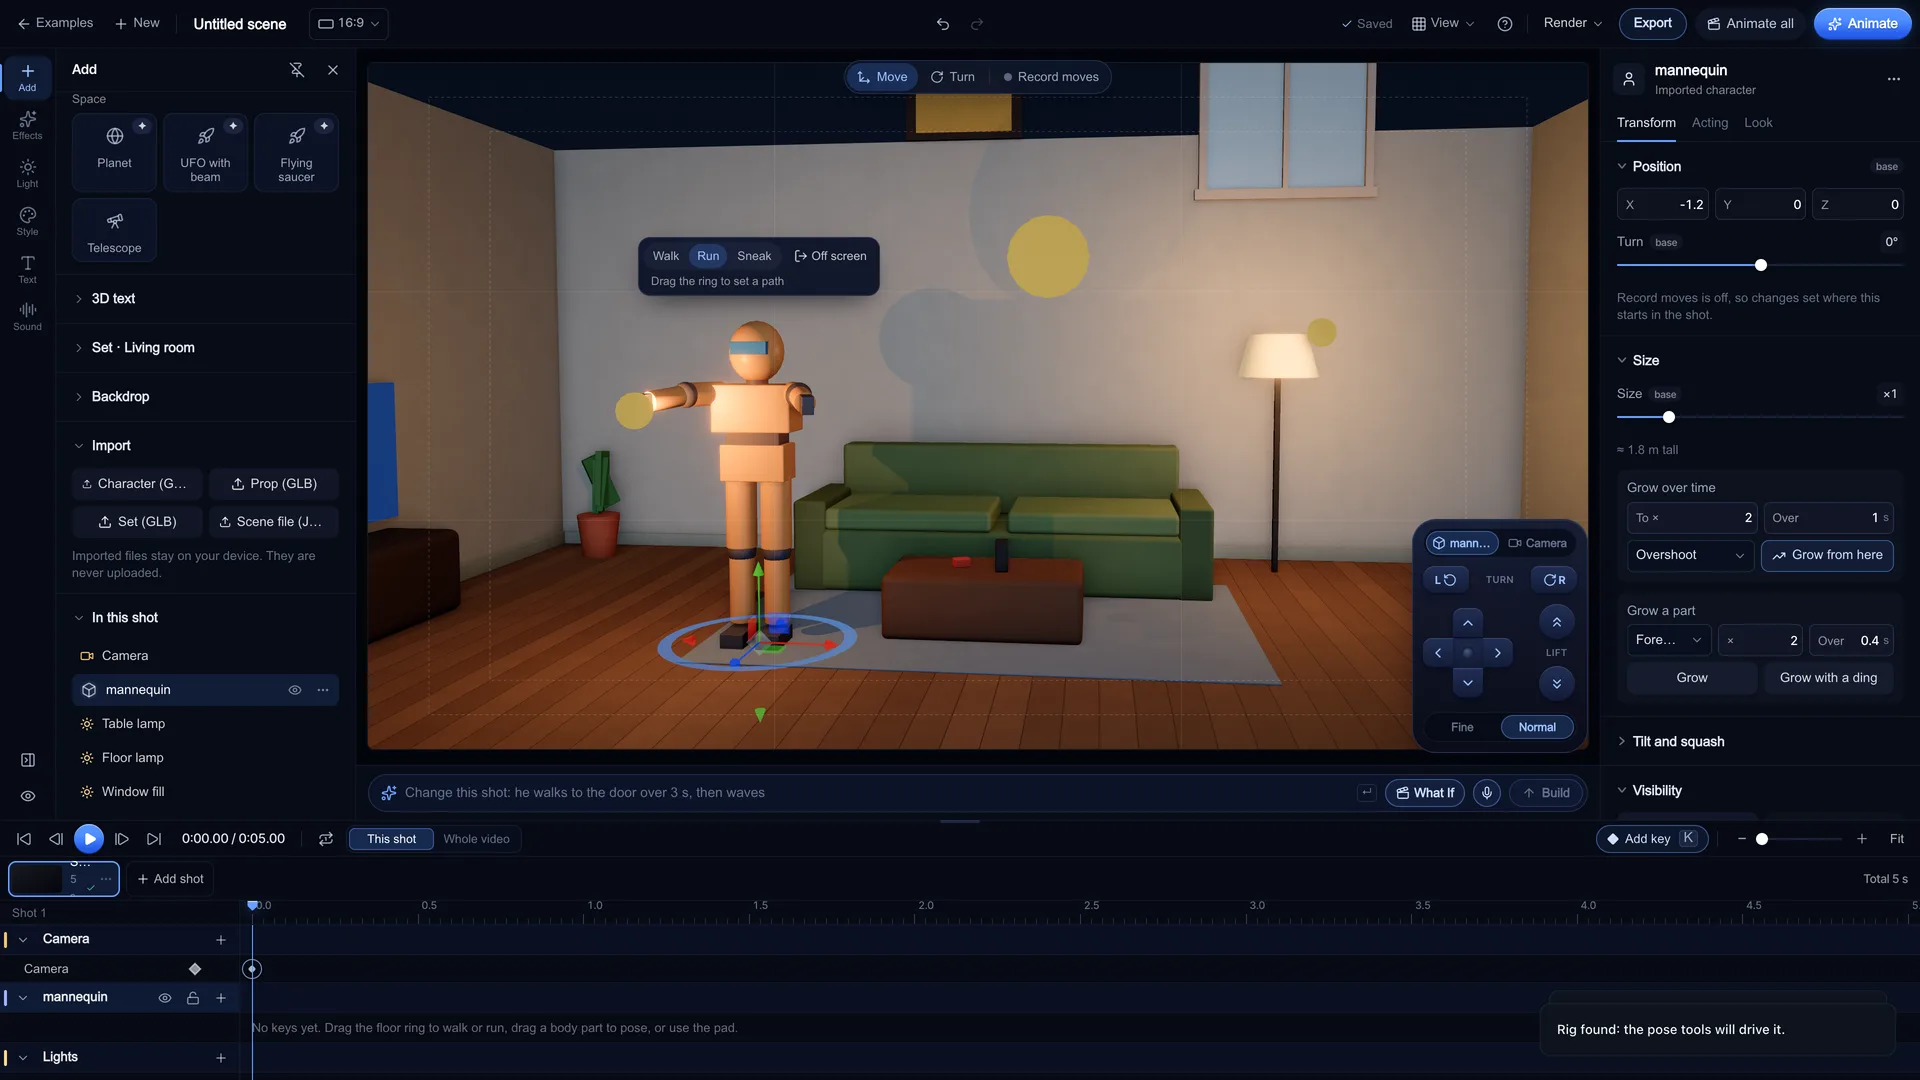
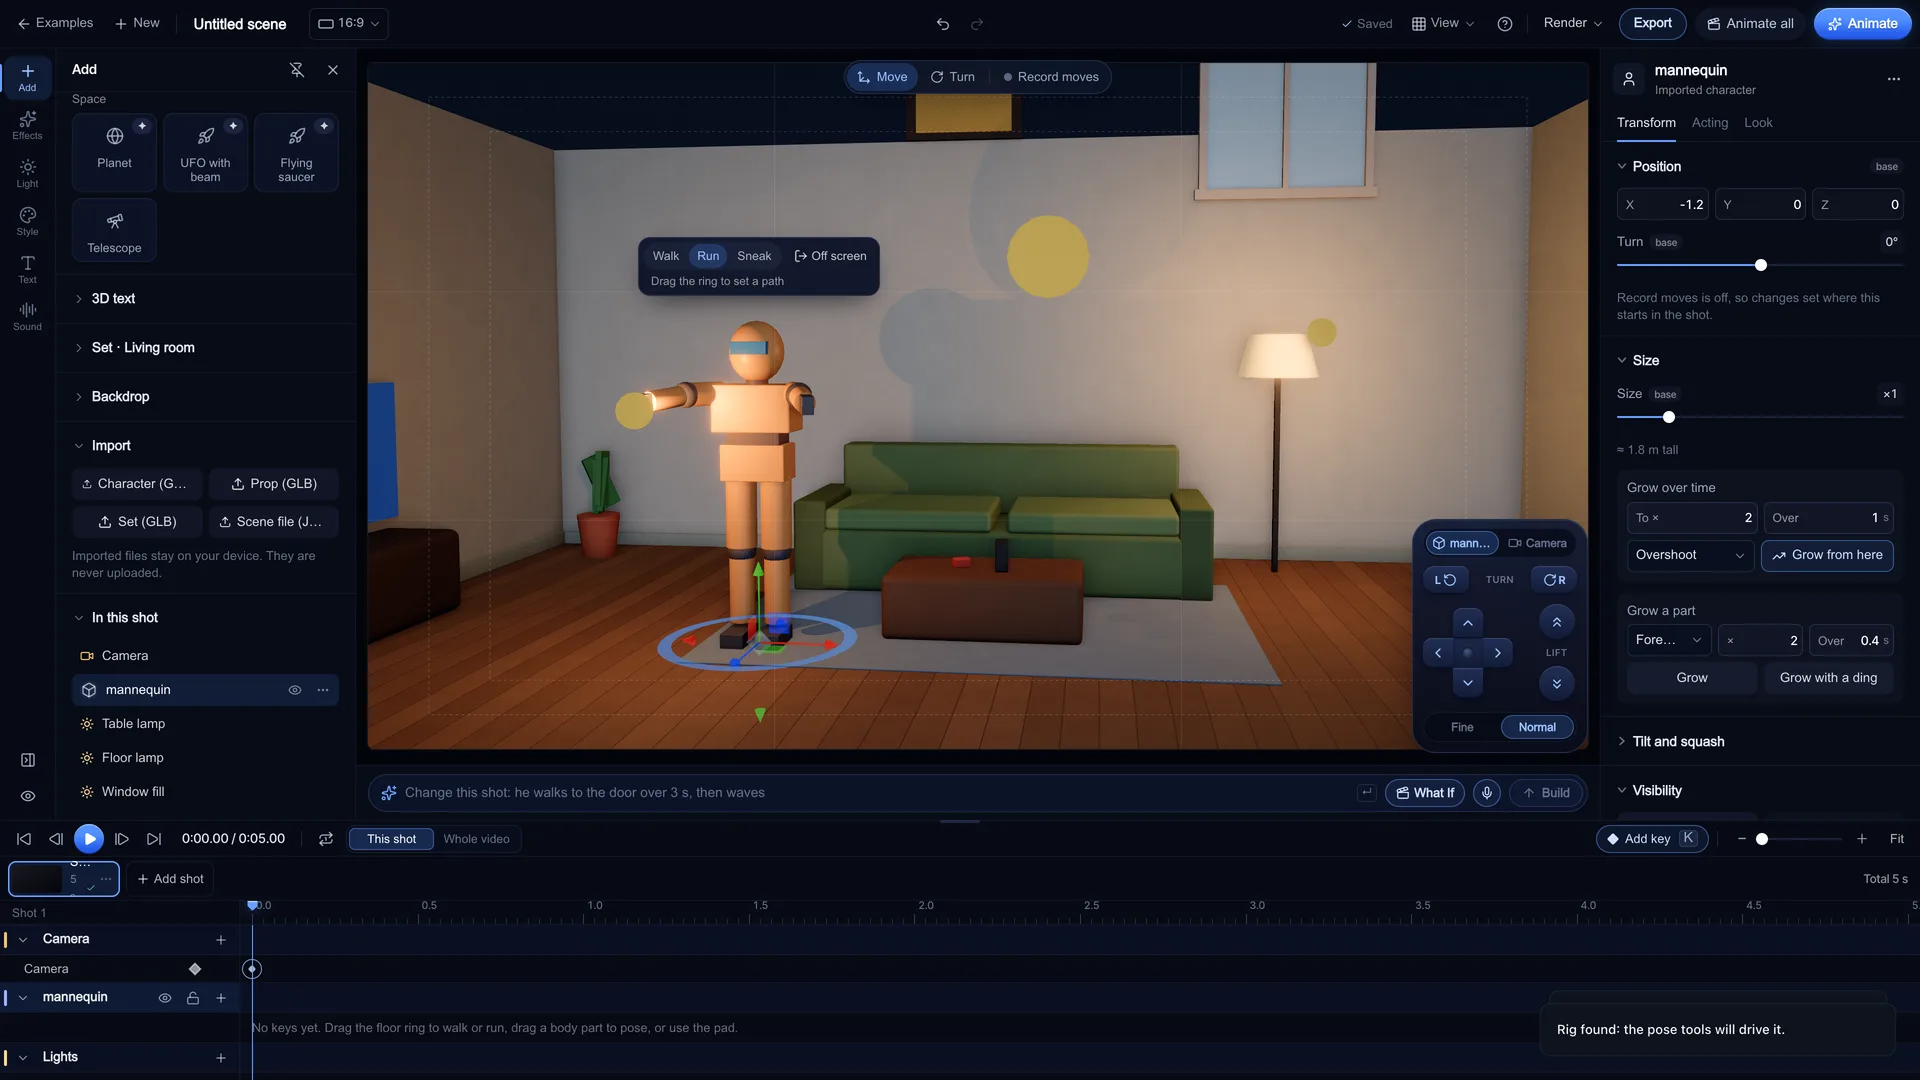
Open Stage, start a new project with New, then open the Add tab in the library and the Import section. Choose Character (GLB, VRM) for a person, Prop (GLB) for an object or Set (GLB) for an environment. If Stage finds a humanoid rig it says "Rig found: the pose tools will drive it." Imported files stay on your device and are never uploaded.
Screenshot of kreatorflow.ai, 2026-11-06 - 3
Pose and block the shot
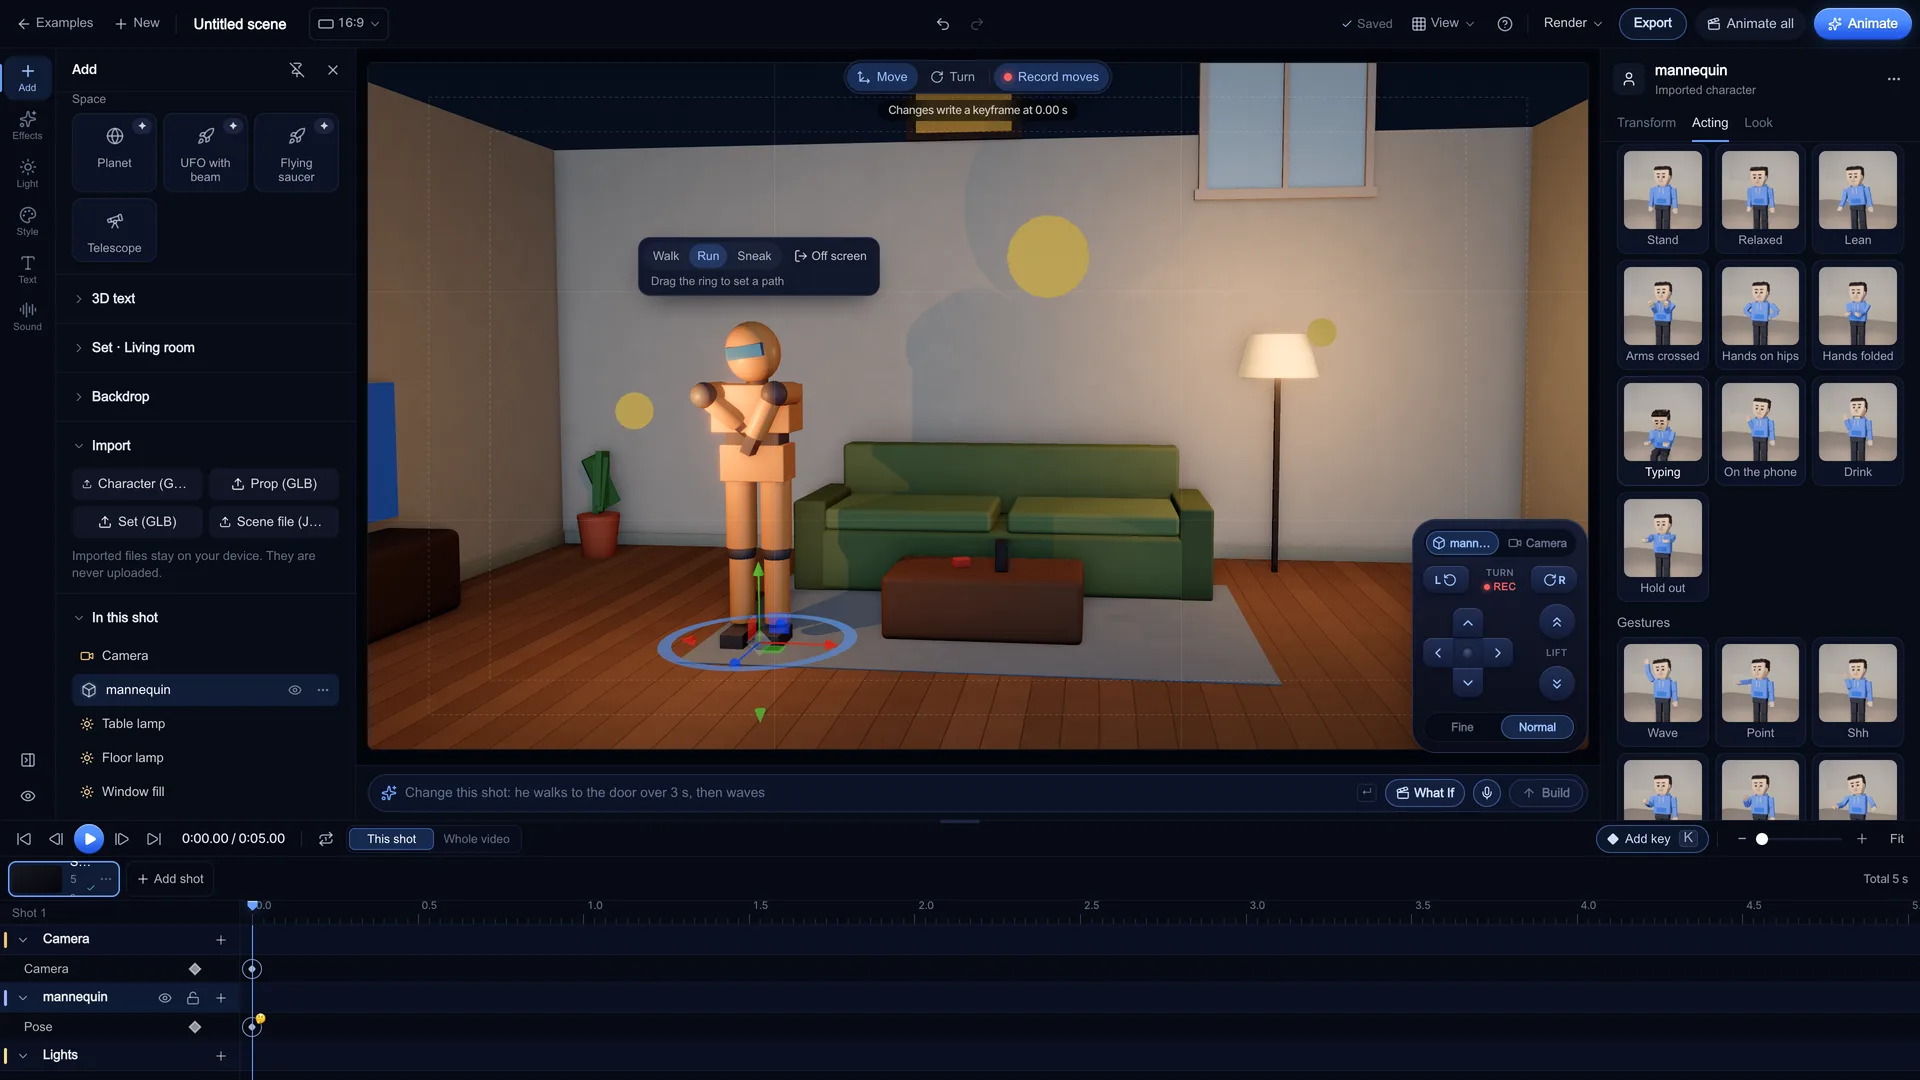
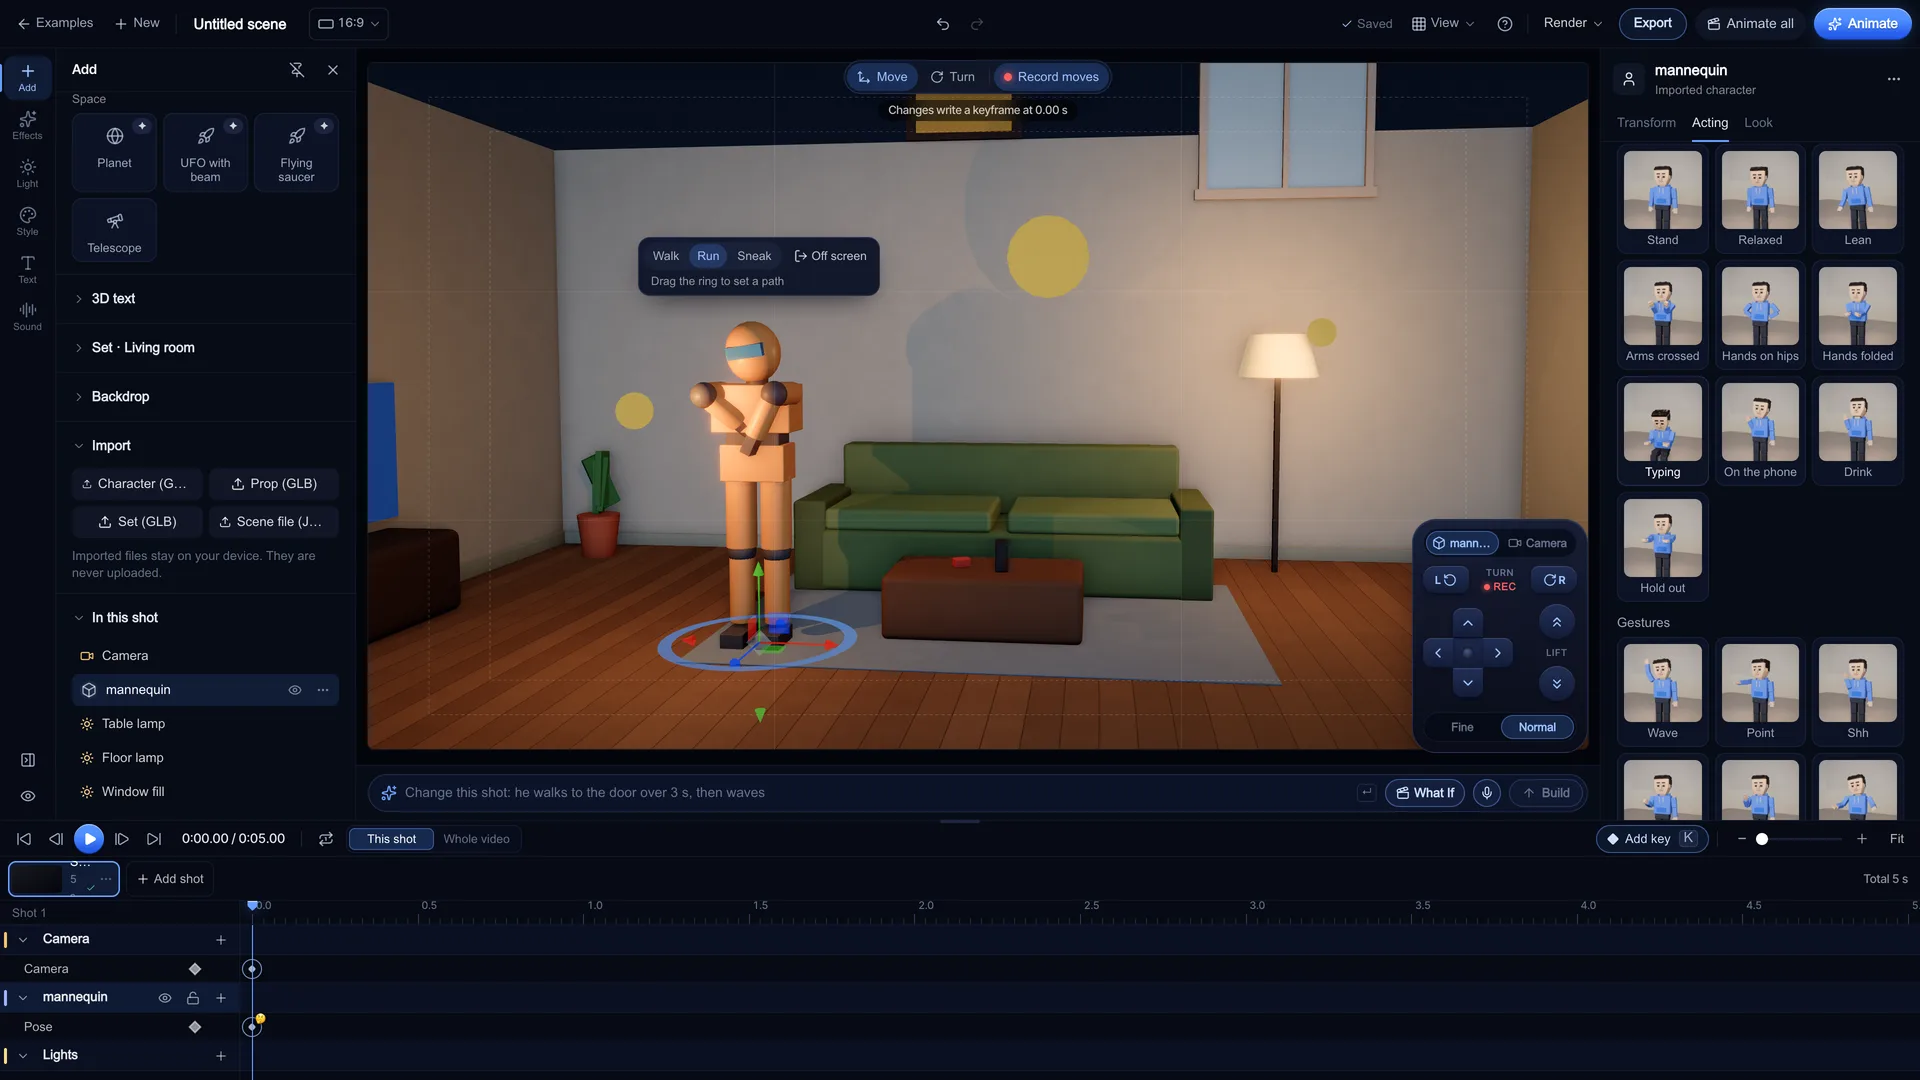
Select your character and use the Inspector: Pose and Pose strength, Left hand and Right hand, Expression (on VRM models), Look at and Walk to. Turn on Record moves so each change writes a keyframe at the playhead, or press K to add a key. Set each key's easing to Ease in and out, Anticipate, Overshoot or Hold, as you would in the Graph Editor.
Screenshot of kreatorflow.ai, 2026-11-06 - 4
Set the camera and the light
In the camera Inspector pick a Framing, a Lens (presets 14, 24, 35, 50, 85, 135 mm, or any value from 10 to 200 mm), an Aperture (f-stop) and a Focus target, then add a camera move such as Push in or Orbit left. In the Light tab, start from the Three-point studio preset and adjust each light's Colour temperature in kelvin.
- 5
Animate one short shot
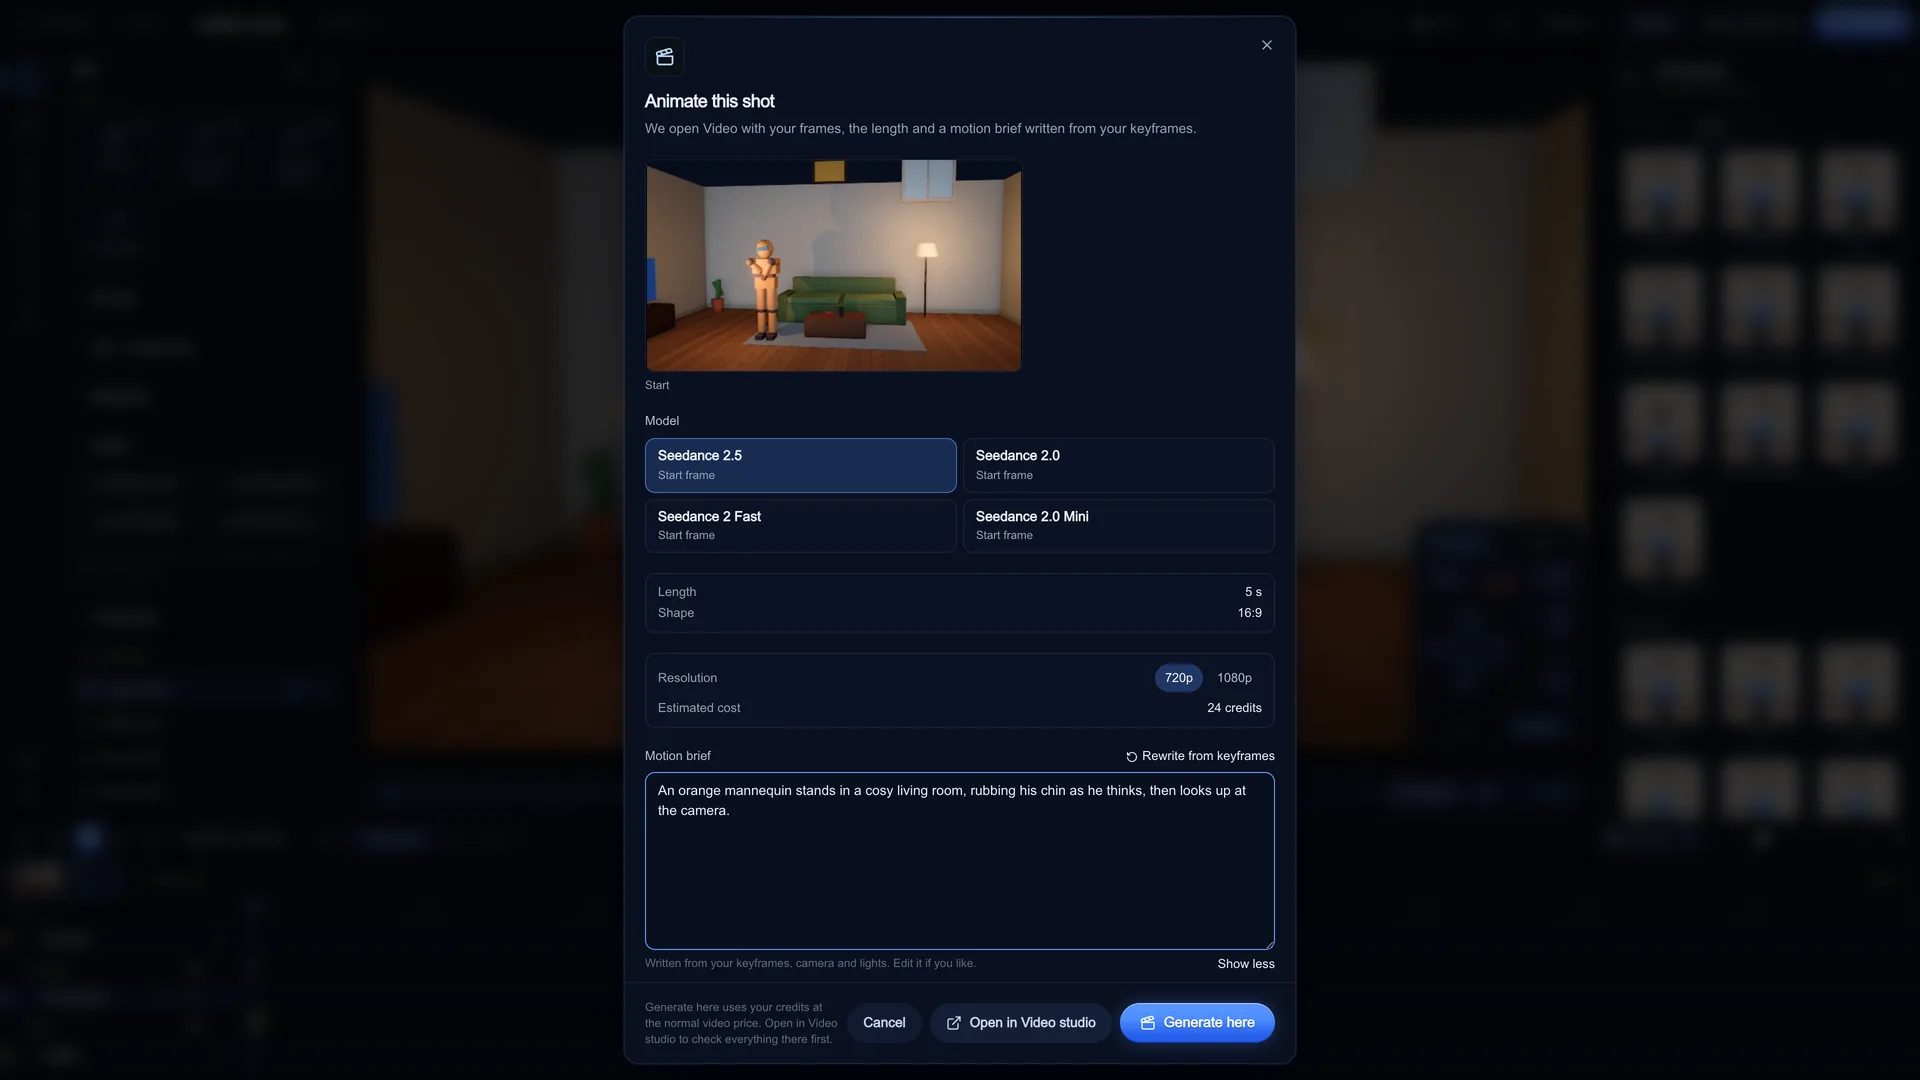
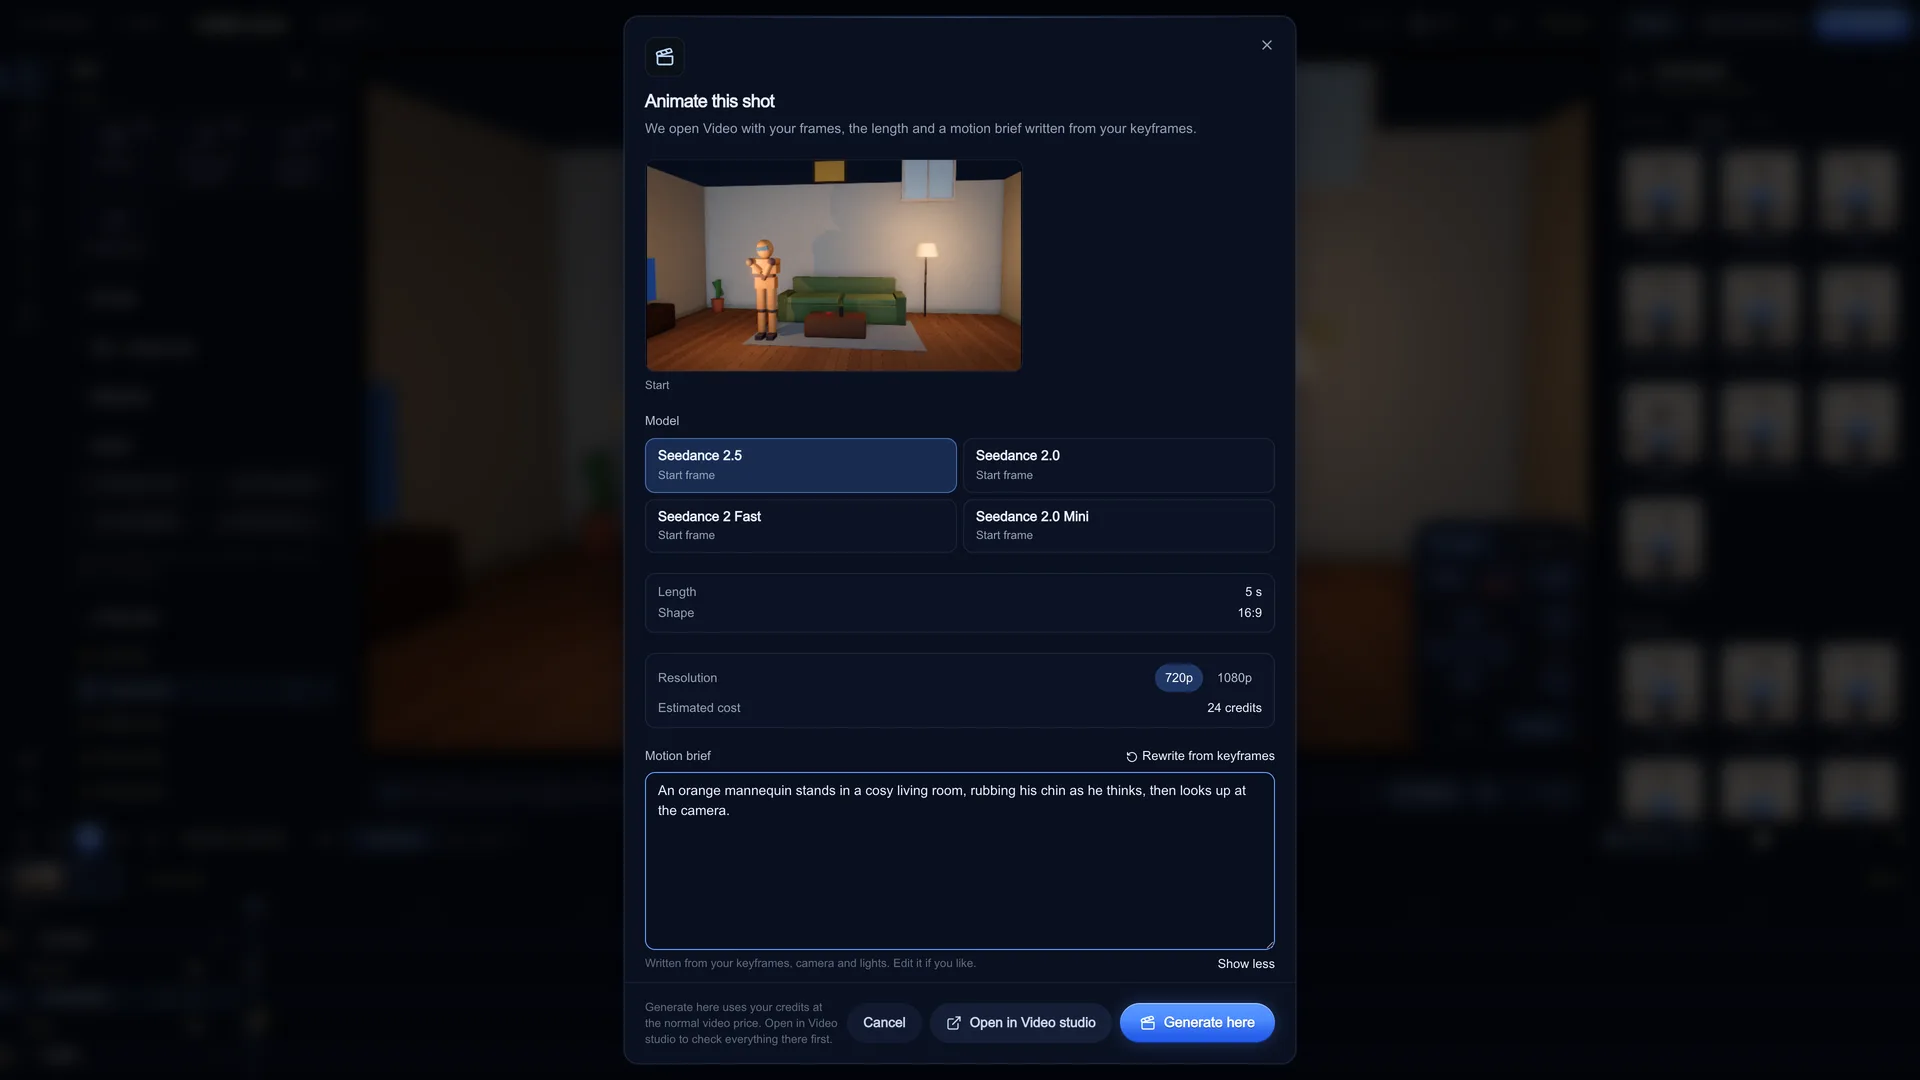
Press Animate. The Animate this shot dialog renders a clean start frame, lets you pick the model, snaps the length to what that model makes, shows the Estimated cost and writes a Motion brief from your keyframes, which you can edit. Generate here spends credits at the normal video price; Open in Video studio lets you check everything there first. A 5-second 720p Seedance 2.0 clip costs 15 credits (30 at 1080p), and Seedance 2 Fast costs 12 at 720p.
Screenshot of kreatorflow.ai, 2026-11-06 - 6
Compare it with a prompt-only clip
In the Video studio, write a text-only prompt for the same subject and action and generate it at the same length and resolution. Put the two clips side by side. The planned one keeps your framing, your character's look and where things sit in the frame; the prompt-only one is the model's own guess.
What carries over from Blender
AI video models are good at texture and motion and weak at intent. They do not know where the camera should be, which way the actor faces or when the push-in should land. Those are the decisions a 3D artist already makes every day, and they are exactly what a planned start frame and a motion brief give the model.
- Lenses: thinking in millimetres. Stage's lens presets are 14, 24, 35, 50, 85, 135 mm, with a free value from 10 to 200 mm, plus aperture and a focus target
- Three-point lighting: key, fill and rim, colour temperature in kelvin, and practical lights in the set
- Keyframes and easing: ease in and out, holds, anticipation and overshoot all exist in Stage's timeline
- Staging and blocking: marks, eyelines, over-the-shoulder and two-shots, and keeping the subject readable
- Shot length and pacing: cutting a sequence into short shots, each with one clear action
- Asset building: your modelling, sculpting, texturing and rigging stay in Blender, where they belong
What changes when the model does the rendering
In Blender you control every pixel and pay in render time. With AI video you control the layout, the first frame and the motion description, and the model invents the rest: skin, cloth folds, hair, reflections, background extras and secondary motion. Two takes from the same plan will differ.
So the loop changes from tweak and re-render to plan, generate and pick. Instead of waiting for samples, you generate a take, judge it and either keep it or change the plan and try again. Each take costs credits, so a clear plan saves money: the fewer surprises in the start frame and brief, the fewer rerolls you need.
Clip lengths are fixed per model too. Seedance 2.0 makes clips of 4 to 15 seconds in set steps, and Stage's Animate dialog snaps your shot to the nearest one and says so, so time your action for the length you will get.
Seedance uses your start frame as the exact first frame; the motion brief describes where the shot goes from there.
What a first shot costs
Planning in Stage is free and works without an account. Generating the video uses credits, shown in the Animate dialog as the Estimated cost before you press Generate here, or in the Video studio before you press Generate. A 5-second 720p Seedance 2.0 clip costs 15 credits (30 at 1080p), and Seedance 2 Fast costs 12 at 720p.
KreatorFlow is an official partner of BytePlus, a ByteDance company.
Read from the studio's credit code. Stage offers 720p and 1080p.
| Model | 720p | 1080p |
|---|---|---|
| Seedance 2.0 | 15 | 30 |
| Seedance 2 Fast | 12 | 20 |
| Seedance 2.0 Mini | 9 | 17 |
| Seedance 2.5 | 24 | 50 |
A first-week plan for 3D artists
Day one, skip your own assets: open one of Stage's 14 examples, move a character, add a camera move and press play, so you learn the controls on a scene that already works. Then bring in your own model and follow the steps above for one shot. By the end of the week, cut three or four planned shots into a short sequence and compare it with what prompting alone gave you.
- Export one character from Blender as .glb and import it as a character
- Block one shot with a single clear action and a camera move
- Animate it at 720p first, then generate your best version at 1080p
- Make the same shot prompt-only and compare the two
- Plan a short sequence of shots and export the previs video to check the cut
Where AI video still falls short
Be honest with yourself and with clients about the limits. AI video is fast and cheap per shot, but it is not a replacement for a full 3D pipeline yet.
- Exact continuity: a prop, a logo or a hand pose can drift during a take
- Precise physics and simulation: cloth, fluids and destruction look plausible, not engineered
- Long unbroken shots: each clip has a maximum length, so long takes are built from several shots
- Frame-exact timing: the model interprets the brief, so a beat can land a little early or late
- Final control over every pixel: you choose between takes rather than fixing one pixel by pixel
When to stay in Blender
Stay in Blender for modelling, sculpting, rigging, simulation, and any shot that needs exact, repeatable frames, such as product renders with fixed branding. Use Stage when the final pixels will come from an AI video model and you only need to plan the shot: it opens in a browser tab, needs no install and hands the shot straight to the Video studio. Stage runs on a desktop or laptop; phones can view the examples but not edit.
Turn it into work
Studios and brands hiring for AI video want people who can deliver a finished, consistent short, not loose clips. A 3D artist who can plan shots, keep a character on model and cut the result has a real edge. Read the career guide for how to build a portfolio and what to learn next.
Questions other guides skip
Can Stage open Blender project files or export back to Blender?
No. Stage does not import or export .blend, FBX, OBJ, USD or Alembic files, and it does not export camera data to Blender. Bring models in as glTF (.glb or .gltf) or VRM. What Stage exports is a previs video, clean start and end frames as PNG, and a scene file (JSON) that only Stage opens.
Will my Blender rig work with the pose tools?
If its bones use common humanoid names, yes. Stage looks for VRM humanoid bones, Mixamo's mixamorig names and Unreal-style names such as upperarm_l, thigh_l and head. A rig with other bone names still imports, but it moves as one piece, like a prop. Animation clips inside the file play back only partly, so pose in Stage rather than relying on baked actions.
How do I export a VRM from Blender?
Blender does not export VRM on its own; the free VRM Add-on for Blender adds it. VRM is worth it for characters: Stage maps VRM expressions, so the Expression control works on your own face rig.
Source: VRM Add-on for Blender
Does the AI model keep my exact lighting and materials?
It keeps what is in the start frame as its first frame and reads the brief for the rest, but it re-imagines surfaces and light as the shot moves. Treat the Stage frame as your layout and lighting intent, not a final render.
Frequently asked questions
Will AI replace 3D artists?
Nobody can say for sure. What is clear today is that AI video changes which part of the work takes the time: rendering gets faster, while planning, art direction, asset building and judging takes still need someone who understands cameras, light and motion. Those are 3D artists' core skills.
Can I keep my own characters consistent across AI clips?
Yes, more easily than with prompts alone. Import your character into Stage as a .glb or .vrm, and every shot starts from a frame with your real model in it. Keep the same model, outfit and lighting from shot to shot, and keep the brief's description of the character the same.
Can I import Blender files into Stage?
Stage does not open .blend files. Export from Blender with File > Export > glTF 2.0 and import the .glb or .gltf in Stage's Add tab under Import. VRM characters work too.
Is Stage free?
Planning in Stage is free and works signed out. Turning a shot into a video uses credits, and the cost is shown before anything is generated.
Do I need a powerful computer?
Stage renders with WebGL on your own graphics card, in the browser, with nothing to install. It needs a desktop-sized window; phones get a read-only viewer for the examples.